

last updated 2.5.2014
Notes about this documentation
The following emphases are in use in this documentation:
Mouse, keyboard, button or menu command
Text to write on keyboardImportant concept
Notes or additional details about the topic
There are two versions of Z Vector, one for OpenNI 1.0 and one for OpenNI 2.0. Currently sensor recording is disabled in the OpenNI 2 version due to some instability, but otherwise the versions are identical. However depending on your computer's USB port configuration and your depth sensor one version may provide better performance or stability.
Both versions can be downloaded from the Z Vector download page, where the primary download is the OpenNI 1 version and the OpenNI 2 version as well as older versions can be found on the bottom of the page.
Choose the version based on your depth sensor device:
| Device | OpenNI 1.0 | OpenNI 2.0 |
|---|---|---|
| PrimeSense Carmine | X | X |
| Asus Xtion | X | X |
| Kinect for Xbox | X | |
| Kinect for Windows | X |
On Windows Windows 7 it doesn't matter if your sensor device is connected or not during the install. On Windows 8 you should not have the sensor device connected during the install.
If you have previously installed SensorKinect, OpenNI or NITE, it's strongly recommended that you either uninstall all of them or update them to the latest versions before installing Z Vector.
If you have any other device drivers (like the Kinect for Windows SDK) installed other than SensorKinect you must uninstall these before installing Z Vector.
This option is usually auto detected and will be unselected if you already have the SensorKinect driver installed. If this option is checked you should most probably not change it as your sensor device won't be usable without the driver.
If you don't have an appropriate driver installed and this option is unchecked there could have been a problem with the automatic driver detection and you should select it for the installation.
By default Windows 8 requires that all installed device drivers are signed and doesn't allow installation of non-signed drivers. The sensor driver that Z Vector uses is not signed so some extra steps are required to enable trouble free installation.
Press Win+R to open up the run prompt and enter
shutdown.exe /r /oPress OK to restart to the Choose an option screen.
Select Troubleshoot (icon with tools).
Select Advanced options (Icon with check boxes).
Select Windows Startup Settings (Icon with gearwheel).
Press Restart to restart the computer to the Advanced Boot Options screen.
Select Disable Driver Signature Enforcement.
Once the computer starts install Z Vector.
If you have a Kinect for Windows device you should install the Kinect for Windows runtime drivers or SDK from Microsoft before using the sensor device. We strongly advise you to read all the relevant licensing terms prior to doing so.
If you have a PrimeSense Carmine or ASUS Xtion device the correct drivers are included in the Z Vector installer.
First try the OpenNI 1 version, but if you get problems with yor depth sensor you should switch to the OpenNI 2 version.
Simply drag the Z Vector application from the disk image to the Applications folder.
This section gives an overview of the different parts of the Z Vector user interface.

The left part of the header contains the Z menu and menus for the current scene and profile.
The right part of the header contains many quick options that effect the way Z Vector works.
For an in depth explanation of all the header options see the header details.

The scene controls are always accessible and control general aspect of Z Vector. All of these controls are saved to the current scene. In order from top to bottom the controls are:
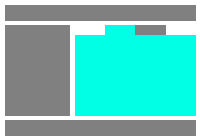
The input tab holds the

The effects tab panels apply various effects to the mixed depth data. The different panels are:
The meta controls on the bottom of this tab allow you to change multiple parameters with a single slider.
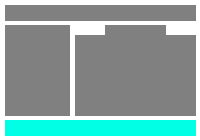
The status bar shows information about any Z Vector control when the mouse cursor is over a control. A short description is shown on the right side and the OSC path and value range is shown on the right side.
If the mouse cursor is not over a control the status bar shows the last line of the Z Vector log.
This section explains the main concepts for a successful Z Vector workflow.
Scenes allow to collect suitable settings for a specific event or a gig. The mixer controls, triggers, enabled control maps and meta controls are stored in the active scene. At startup the active scene is the default scene, which is a great scene for testing. At any point you can create a new scene from the active scene from the Scene Menu -> New Scene.
Profiles store the parameters from the mixer and effects tabs and allow easy changing between different visualizations. At startup the active profile is the default profile, which is a good profile for testing new things. You can create a new profile at any point from the active profile by selecting Profile Menu -> New Profile or by selecting Save as from the profile part of the scene controls.
The profiles themselves are stored as PNG images with embedded metadata in the folder specified in the Z Vector preferences. By default this folder is
[home]/Z VectorTo share or rearrange your profiles all you need to do is copy/move the wanted PNG files in that directory. You can even post them to the internet and drag'n'drop them directly to Z Vector profile triggers from the browser. Just make sure that if you post the images to the internet the file hosting service shouldn't touch the image metadata as this will remove the actual profile information.
The mixer controls allow mixing the live output between two profiles - profile A and profile B.
The crossfader chooses which of the profiles is seen in the output. If the crossfader is all the way to the left profile A is shown in the live output and if it's all the way to the right profile B is shown in the live output. If the crossfader is between the endpoints a dynamic mix of the two profiles is generated and this mix is shown in the live output.
When the crossfader is all the way at the non-active profile side you can freely modify the active profile's parameters without effecting the live output. Once you're happy with the active profile's output you can mix the live output smoothly to the active profile.
The active profile can be chosen with the A & B buttons on next to the crossfader. The input and effect tab parameters always reflect the currently active profile.
The Preview/Live selects between showing the active profile and live output in the mixer preview.
If preview mode is selected and the crossfader is moved the mixer preview changes to show the live output to make it easier to see how the mix happens in the live output.
Whenever the crossfader moves over the midpoint the active profile is automatically chosen to be the one that the crossfader is moving away from. This means that once you move the crossfader to it's endpoint you can always be sure that the live output is not effected by the parameter changes.
The different triggers are collections of profiles, backgrounds and depth samples that you want to keep close at hand for simple activation. If available each trigger will also display a thumbnail for easy identification of the asset.
Profile triggers set the currently active profile.
Background triggers set the current background.
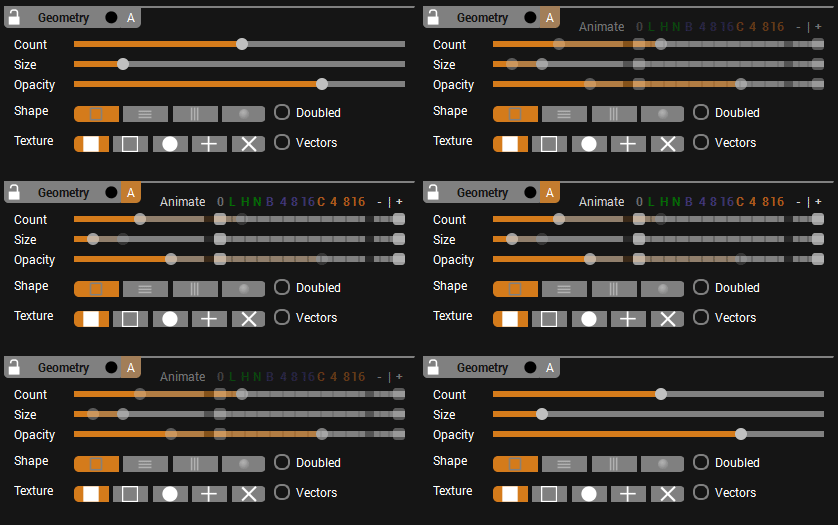
Each of the panels in the input and controls tabs can be detached into separate windows by clicking on the panel name. This allows you to keep the parameters you want always close at hand.
The panels also have a panel lock button next to the panel name. Enabling the lock will prevent any modifications of the panel's parameters via profile changes or randomizations. This is very useful for the situations where you want to keep certain parameters constant, but still load other parameters from a new profile.
In addition to the lock button the panels can have an input indicator, which will flash green whenever any parameter in that panel is changed. This allows for easy identification of changes when the parameters are mapped for example to MIDI controls.
The last component in the panel header is the animation controls toggle, which shows/hides the animation controls for the panel. The state of this toggle is saved to the current scene.
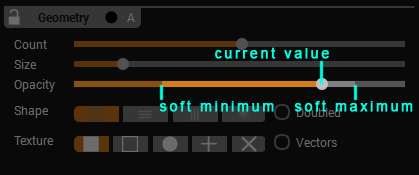
Dragging a slider or dial control will show the current value of the parameter. You can also click on the slider or dial directly at the position you want to set the parameter to. Many of the slider and dial controls in Z Vector can be reset to their default value by right-clicking on them.
The parameter sliders also have a soft value range that can be defined by ctrl/cmd- or alt- clicking the slider. While the soft minimum or maximum is being set the value is shown on the right or left edge of the slider. The soft value range is used for parameter animations using the animation signals and for defining the range of parameter values that are effected when a MIDI controller is used to change a parameter.
Shift-dragging a parameter slider will change it's value more accurately in increments of 1.
Controls with a value range from negative to positive have a decreased sensitivity near value zero, so that they can be set to zero by simply moving the value somewhere near the zero point. This is especially useful when using a MIDI controller to change the parameter.

Many of the parameters in Z Vector are changed with slider controls. Most of these sliders have animation controls associated with them. Selecting an animation signal for a parameter will make it's value change based on the signal's current value.
The direction of the change is determined by the animation direction control:
The negative animation direction (-) animates the parameter value from it's current value to the parameter's minimum value when the animation signal level reaches it's maximum value.
The ping-pong animation direction (|) animates the parameter value from it's current value towards it's maximum value whenever the animation signal level is above the half way in the signal preview and towards the parameter's minimum value when the animation signal level is below the half way in the signal preview.
The parameter animation will always stay between the parameter's soft value range if it's set.
When an animation signal is selected the current parameter value is shown as a moving dot along the slider.
The Z Vector's main playground is a big grid of 3D pixels that you can fill with data from a depth sensor, depth samples or the background plane. The two depth inputs' relative depths are controlled by the depth panel's mix parameter. When the mix parameter is at the center the depth data from both input A and B are at their correct depth. Moving the mix slider to the left gradually fades input B's depth backwards and moving the mix slider to the right fades input A's depth backwards.
The shift parameter moves the inputs sideways. In the shift parameter's center position both inputs are at the center of the 3D grid. When moved to either edge the inputs are shifted sideways and some curvature is added to the grid to minimize the depth distortion.
The placement of the background plane (along the depth axis) is controlled by the BG parameter. All depth pixels with no depth or a depth greater than the background plane's depth are replaced with the background depth.
The final thing that effects the mix result is the fade parameter, which sets a threshold depth at which the pixels are faded to black.
This section explains each part of the Z Vector control interface in detail.

This has a link to the help documentation and information about the current version of Z Vector. It also allows you to quit Z Vector when the control interface is in fullscreen mode.

This menu always shows the active scene as it's text and can be used to change the active scene or to create new scenes. The changes to the mixer controls, triggers, active control maps or meta controls are always saved automatically to the active profile.
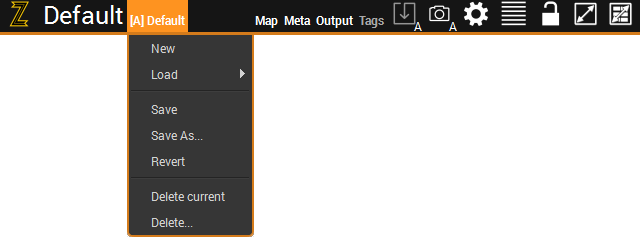
Profiles store all of the visualization parameters in the input and controls tabs and allow you to quickly change between different visualizations.
This menu always shows the last loaded profile as it's text and can be used to change the active profile or to create new profiles. In contrast with the scenes the changes to the active profile are not saved automatically. This means that you can easily create different variations of a profile by first setting it as the last loaded profile and then modifying the visualization parameters and saving these as a new profile.
Save the current parameters under a new profile name.
The given profile name turns red if the given name contains invalid characters and blue if a profile with the given name already exists.

The map button activates the control mapping mode, in which you can assign any Z Vector parameter to a MIDI/keyboard message. When in mapping mode the control map settings are shown under the header and each parameter will change into mapping mode.
Mapping Z Vector parameters to any MIDI message or keyboard command is very easy:
Select the currently editable map from the map selector or create a new map with the New... button.
Select the wanted map controller (MIDI device/keyboard) for the current map.
Click a parameter to set it to learn mode.

After you have completed the mapping make sure to enable the map for the current scene by checking the enable map checkbox and exit the control mapping mode from the map button. Each enabled control mapping will have a + symbol next to it in the mapping selection menu. Leaving the control mapping mode will save all of the changes to the control mapping.
Deleting a map will remove it completely from all scenes and reseting a map will clear all mapped parameters from the map.
In control mapping mode you can Right click any parameter to show the control value menu, which allows you to set the MIDI message for the parameter manually and also invert the message action or to change the message into toggle mode.
By default the received MIDI messages will change the parameters through their whole value range or in the case of keyboard buttons to the parameter's maximum/minimum value. You can set a soft value range for the controller when not in control mapping mode by ctrl/cmd clicking a parameter to set the soft minimum and by alt clicking a parameter to set the soft maximum. The received MIDI messages and keyboard presses will be mapped to the soft value range, but you can always move the parameter beyond the soft range with the mouse.

With meta controls you can change multiple parameters with a single meta value. The meta map header button activates the meta mapping mode, in which you can assign any Z Vector parameter under a meta control. The actual meta controls can be found on the bottom of the controls tab.
In meta mapping mode the currently active meta control is selectable from the meta selector buttons that appear under the header. The list of currently mapped parameters is shown under each selector button. 'Right clicking' or 'double clicking' a parameter in these lists shows the meta mapping options for the parameter.
After selecting a meta control you can associate different parameters to it by simply selecting parameters with the mouse from the Z Vector ui. By right clicking a parameter in meta mapping mode you can access more options, such as inverting the meta control's effect on the parameter. By default the meta controls will be mapped to the parameter's soft value range, but you can override this behavior by selecting a minimum/maximum value percentage in the additional meta mapping options.
Notice that you can also control the meta control values with MIDI messages by selecting a MIDI message for the meta control in the meta tab when in controller mapping mode. This allows you to create very complex MIDI controls.

The rendered output will have the resolution selected here. The bigger the resolution the more resources it will take to render the output.
Note that this is not necessarily the same as the resolution of the output window. If the render resolution and output window resolution are not the same the rendered output is scaled to fit the output window while preserving the render resolution's aspec ratio.
Choosing Window or Half window will adjust the render resolution to match the output window's resolution (or half of it).
The output can be shown in a detached window or in a full screen mode. If there are two displays connected the full screen will be shown automatically on the display the main window is not on. The detached window's position is remembered between program re-starts.
The full screen mode can also be activated with the direct full screen button in the header.
In the case the detached output window is not visible it's position and size can be reset by clicking the Reset Position button.
In the case you have multiple screens (or projectors) connect to your computer you can select the output screen (or a combination of the screens) manually from the gear icon next to the full screen button.
Selecting one or more of the displays manually will skip the automatic fullscreen assignment and adjust Z Vector's output to fill all of the selected displays. Selecting none will return to the automatic behavior.
Depending on the connected display/projector and the operating system's color profile the light/dark or color balance could be a bit off. Adjusting the gamma values can correct these problems.
The output test pattern has gamma guides that can help in finding the correct gamma values.
The test pattern shows geometric shapes and some information about the current Z Vector settings. It also contains gamma and brightness & contrast guides to help determine the needed output adjustments.
The stepped gradient in the bottom of the main circle can be used to adjust brightness and contrast. When these are correct every bar in the gradient should be visible.
The gamma guides at the top of the main circle can be used to adjust the gamma values. When the output gamma is correct the strip-colored bars should blend into the fully colored bars.
The gamma guides will be shown correctly only when the render resolution matches the screen resolution and the output is viewed in full screen mode.
Z Vector supports multiple different stereo rendering modes from side-by-side to different anaglyph modes and also a dedicated mode for the Oculus Rift.
In Oculus Rift mode the output resolution is automatically set to the Oculus Rift's display resolution and the manual output resolution settings are ignored.

The profile tags will become available when some other that the default profile is made active. The tags don't effect the profiles functionality in any way but allow you to categorize profiles into groups. Profiles will be grouped under these tags in any profile related menu.
The profile tag editor allows you to create new tags and to assign or remove any tags from the active profile. Clicking the apply tags button will save the selected tags to the active profile and clicking the reset tags button will re-load the profiles original tag selections. Any tags that are not assigned to any profile when the tag editor is closed will be removed automatically.
![]()
The save profile button will save the changes to the active profile. The name of the active profile is always shown on the right side of the current scene name in the Z Vector header. The small A/B letter in the button indicates the active profile selected in the profile mixer.
![]()
The screenshot button creates a png image of the current output with the active profile parameters embedded. You can share your visualizations easily by simply sharing these screenshots. The screenshots will be saved to the folder specified in the Z Vector preferences and named with the current date and time. You can drag these screenshots directly back to the Z Vector profile triggers or import them via the profile menu. Before sharing you should name the screenshot with a descriptive name as this will be the default name given to the profile when it's loaded back into Z Vector.
The small A/B letter in the button indicates the active profile selected in the profile mixer.
![]()
Clicking the preferences button will open up up the preferences editor. The Z Vector preferences are global options that are not changed by scene or profile changes.
The Z Vector's profile mixer can be made to function in three different modes:
This folder specifies where the Z Vector profile PNG files are stored and where any screenshots will be saved. If you change this folder you must copy the existing profiles to the new location in order to use them in Z Vector.
OSC input allows you to control any Z Vector parameter with OSC messages. You can see the parameter's OSC name in the right side of the status bar by moving your mouse over the parameter. Each OSC message should be sent to the address
/Z Vector/parameter_namewhere parameter_name is the parameter's OSC name and to the specified port. The message should contain the desired value as a boolean, integer or a floating point number in the value range specified in the status bar next to the parameter's OSC name.
The selected audio input is used for real time audio signal analysis. The signal analysis will produce the low, high and noise signals, which can be used to animate many of the Z Vector parameters.
This part of the preferences allows you to see the licensed sensor id and remove the current licence or activate a new licence.
The 3D camera's origin relative to the depth sensor's location for both inputs. At 0,0,0 the camera origin will be centered at the sensor's location. You should modify these values if you need to match the rendered view to something in the real world. One example is to match the Z Vector output to a projection.
![]()
Clicking the log button will open up the log viewer, which shows messages about what Z Vector is doing. Any errors will also be reported here.
![]()
Under normal operation Z Vector will ask if you want to save the changes to the current profile when either loading a new profile or quitting Z Vector. This can be very distracting in a live environment, so activating the live mode will automatically discard any changes to profiles and load new profiles happily without asking unnecessary questions.
The live mode is automatically enabled and locked when full screen mode is entered.
![]()
This button sets the live output window directly into fullscreen mode and enables the live mode to make it easy to get going straight away.
![]()
The fullscreen interface toggle will set the Z Vector control interface window in to full screen mode to allow for distraction free Z Vectoring.
The scene controls hold the output preview, the profile mixer as well as most of the settings which are stored per scene.
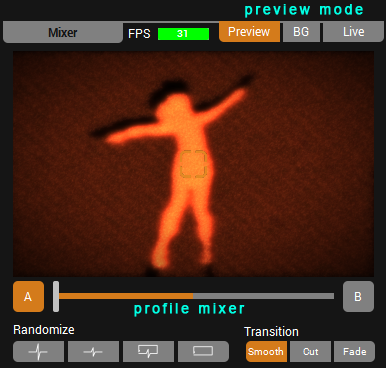
Depending on the selected preview mode the mixer view will show:
A preview of the current active profile. This will not reflect the actual output unless the profile mixer slider is on the same side as the active profile.
Dragging the preview with the left mouse button rotates the camera up and down (pitch and yaw), you can reset these rotations by right-clicking the camera preview.
Alt-dragging the camera preview will rotate the camera around it's view axis (roll) and alt-right-clicking the camera preview will reset this rotation.
Shift-clicking the camera preview will set the screen position of the rotation center point and shift-right-clicking the camera preview will reset the rotation center's screen position to the center.
The mouse wheel can also be used to zoom in/out when the mouse cursor is on top of the camera preview.
Shift-scrolling will control the camera's field of view.
All of the parameters in the input and controls tabs reflect the active profile slot, either profile A or profile B. The active profile slot can be selected by clicking on the A and B buttons on both sides of the profile mixer slider. Loading a profile from the menu or with a profile trigger will load it to the active profile slot and the other profile slot will remain unchanged. Depending on the mixer behavior selected in preferences the active profile slot can be selected automatically when the profile mixer is moved.
The live output from Z Vector will always be a combination of the two profiles based on the mixing ratio of the profile mixer. When the the profile mixer is in either edge only that profile slot will effect the output.
Creating smooth transitions between visualizations is achieved by moving the profile mixer to either edge and then loading a profile to the opposite profile slot. After this the profile mixer can be gradually moved to the other edge, creating a smooth transition from profile to profile. Once the other edge is reached the process can be repeated.
The profile transition mode determines how the profile mixer works. In smooth mode the parameters from profile A and B are mixed smoothly during the mix. In cut mode the parameters will only be changed when the middle point of the profile mixer is crossed. In fade mode the input will be faded to black at the profile mixer's center.
The profile randomize buttons allow you to explore visualization parameters in an exciting way. When a randomize button is clicked any panel which hasn't been locked with the lock button next to it's name will have it's parameters randomized. This can often help you in discovering new and wonderful visualizations. For the adventurous user this can also be used in a live environment to create unexpected results in a safe way as you can always return to a known visualization by simply loading a new profile. The suggested workflow is to lock a couple of panels (for example the camera and mixer) so that something is clearly visible in the output and then start exploring by clicking on the different randomization buttons. All of the randomizations will respect the parameter's soft value range if specified by ctrl/cmd or alt clicking on the parameter slider.
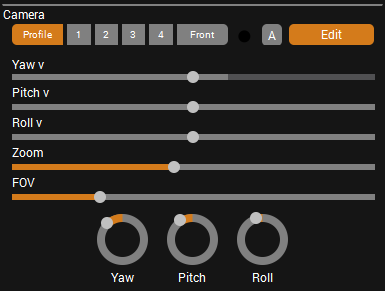
The camera preset controls allow you to save and load specific camera parameters easily. The "Profile" option will load the camera parameters stored in the current profile and the "Front" option will reset all camera rotations and set the default zoom and field of view parameters. Shift clicking any of the options 1-4 will save the current camera parameters as a preset under that number. Clicking the same number button without shift will load the saved preset. The camera presets as well as the selected preset mode are saved into the current scene.
The camera edit button allows you to modify and animate the actual camera parameters.

The multiply control multiplies the output colors with a factor allowing you to fade the output to black or to increase the brightness to compensate for ambient lights.
The fade button will fade the output smoothly to black when activated and back to normal when released. This is a great way to keep the output black when you are for example still setting up or between visualization sets.
Neither the multiply or the fade will effect the preview, so you can for example enable the fade, prepare your visualization without anyone seeing it and then reveal it by releasing the fade.
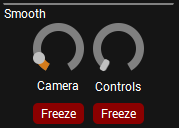
The smooth controls adjust the smoothing of parameter changes for the input and controls tabs. A high smoothing value can create interesting effects during profile changes. Small smoothing values on the other hand are useful in avoiding jerky changes in the visualization caused by uneven mouse or MIDI controller motions. This is especially true for the parameters in the camera panel and this is why the camera controls have their own smoothing value.
Both of the smooth controls have a freeze button that "maxes out" the smoothing. This makes it possible to set the wanted visualization parameters and then release the freeze to move smoothly to the new parameters.
When a parameter's value is changed the smoothing parameter's value is used as a time in beats in which 99 % of the new value should be reached. This allows the smoothing to work predictably even if Z Vector's frame rate changes.

The input shift parameter will move the inputs sideways on the Z Vector pixel grid and allows you to for example position persons from the two inputs next to each other in the output. The parameter direction is based on the direction input A moves. Shifting the inputs also creates a gradual curvature to the 3D pixel grid to avoid any big distortions to either input's data.

The signals are based on the input audio signal and a synthetic beat signal. You can animate many of the Z Vector parameters with these signals by choosing the wanted signal in the parameter's animation signal selector. The parameter smoothing and input strobe features also use the synthetic beat and bar signal for their timing.
The low signal is formed by all of the low frequencies in the input audio, such as a bass drum or a base. The high signal is formed by all the high frequencies in the input audio, many instruments fit this signal. The noise signal is formed by the noise component in the input audio signal, many drums and buildup sounds fit this signal.
The synthetic beat and count signals (B & C) are based on the selected beats per second value or an external MIDI clock signal. The beat signals will be at their maximum value when the selected number of beats have passed. The count signals will start from zero on the first beat of the selected number of beats and raise until the next first beat. The bar indicators will light up one at a time for each four beats.
The tap tempo button allows you to set the bpm value by tapping on the button to the rhythm of the current audio. The fist tap should be on the first beat of a bar and successive taps should be on every following beat. The bpm estimation will get more accurate with more taps. If there are no taps for two seconds the next tap will begin a new estimation. The bar sync button will reset the bar to begin at the time the button is pressed, but will not effect the bpm.

The background video controls show up when a video clip is selected as the current background. These allow you rewind the video, play/pause it, stop playback and reset the background to black, or seek the video.
The input tab handles the input data from depth sensors or prerecorded depth samples and forms the grid of 3D pixels based on those. It also holds the depth background and mixing controls as well as the different trigger buttons.
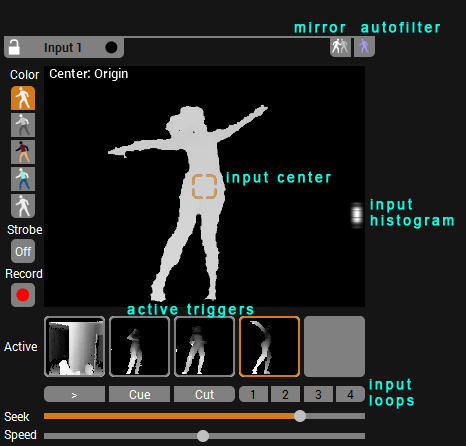
The input preview always shows the input from the live depth sensor or the currently playing depth sample.
By default each detected person is colored in blue. The autofilter option will discard all data from the input that doesn't belong to a detected person automatically. This is a good way to get rid of the often noisy background data easily. You can also select/de-select the shown users manually by shift-clicking on a person in the input preview. Selecting a person manually will color that person green in the input preview. Note that activating the auto filter will de-select any manually selected persons and selecting any persons manually will de-activate the auto filter.
The input center defines the Z Vector camera's center of rotation when the input mixer is set to show only one input. You can move the input center freely by clicking the input preview with the left mouse button. The input center will be placed at the depth that's under the mouse when the center is set making it easy to focus on the person or object that's shown in the input preview. You can reset the center by right-clicking the input preview. By alt-clicking a person the center is locked to the centerline of that person at the approximate height of the click. When the center is locked to a person you can move the center up and down with the mouse wheel while the mouse cursor is over the input preview. You can reset the selections by shift-right-clicking the input preview.
The input histogram shows a representation of the input's depth data in relation to the depth and fade sliders.
The input color buttons change the colors of the input data.
The input mirror button will mirror the input horizontally.
The strobe parameter will toggle the input on and off in sync with the beat signal. The different values measure how many beats are needed for one on/off cycle. This feature is best used while a persistent effect is in use so that the output doesn't go totally black when the input is toggled off. Such persistent effects are for example the background: bleed, filter: feedback and filter: freeze.
The input will show whatever is currently selected in the active input triggers. The first active trigger is always a live sensor (or a reconnect button if no sensor could be detected). The four other active triggers can be filled with pre-recorded depth samples. You can load depth samples to the active input triggers by either right-clicking the trigger, or by clicking a sample trigger in the triggers panel. The difference between the active triggers and the (non-active) sample triggers is that each active trigger is kept in memory after it has been loaded, so the playback of an active sample trigger will start immediately.
The first row of playback controls allow you to play and pause the playback as well as set a cue point or cut to a random position in the depth sample. Clicking the cue button when playback is paused will set the cue point, and clicking it during playback will start playback from the previously set cue point. Once playback reaches the end of the depth sample it will loop back to the beginning.
The numbered input loop buttons allow you to store and activate specific loop segments of the sample clip. To define a loop ctrl/cmd-click the playhead slider starting to set the loop start position and alt-click the playhead slider to set the end position. The loop is used immediately, but you can store it to the loop presets by shift-clicking a loop button. You can recall a previously saved loop by clicking the loop buttons. You can also pre-select the loop that will be played by the trigger by selecting a loop from the trigger's right-click menu.
The sample loops are stored individually for each sample clip in the same folder that the sample file is with the extension .oni_edit.
The playhead slider always shows the current playback location and also allows you to jump quickly to a different position in the depth sample. By ctrl/cmd clicking it you can set the start of the playback range and by alt-clicking you can set the end of the playback range. Whenever the playhead reaches the end of the playback range it will loop back to the start of the playback range. Pressing the cut button will jump the playhead to a random position inside the set playback range.
The playback speed slider allows you to slow the playback down or to speed it up.

The background depth value determines the depth for the background plane. The actual inputs depth data will be replaced with the background depth after this threshold.
The fade end and front depths determine the range of depths where the pixel color will fade from full to black. This makes it easy to smoothly filter out unwanted and often noisy depth data from the depth sensor's extreme range.
The mixer parameters control the way input 1 and 2 are mixed together. When the mix parameter is all the way to the left only the data from input 1 is visible and the depth data from input 2 is offset to infinity. Also the camera's rotation center will match with the center of input 1.
Moving the mix parameter towards the center will keep the data from input 1 as it is, but gradually move the data from input 2 towards it's real world depth. The camera center will also start moving towards the average of input 1 and 2 centers.
When the mix parameter is at the center position both input 1 and input 2 are shown in their real word depth. The camera center is positioned the the mid point between input 1 and 2 centers.
Moving the mix parameter to the right from the center position will keep input 2 as it is, but gradually move the data from input 1 towards infinity. The camera center will also start moving towards input 2's center.

The different triggers are shortcuts to your favourite profiles, backgrounds and depth samples that are available for quick usage at any time. All of the selected triggers are saved into the active scene. The triggers are grouped into 8 different trigger banks which can be used to organize the triggers. Z Vector comes preloaded with the first trigger bank filled with presets, but you're free to customize the banks in whatever way suits you best.
You can organize the triggers within their own sections by dragging them around. You can duplicate a trigger by ctrl/cmd-dragging them to other triggers. Alt-clicking a trigger will clear the trigger.
Clicking a set profile trigger will change the current active profile to the one selected in the trigger. Right-clicking or long-pressing the profile trigger will open up the profile selection menu, which allows you to select the trigger's profile from all of the saved profiles or to import a new profile from a file. You can also drag profile files or Z Vector screenshots with embedded profile data from your computer directly into the profile triggers. You can even drag Z Vector profile embedded screenshots directly from web pages like the [Z Vector profile gallery][Zgallery].
Clicking a set background trigger will change the current background to the one selected in the trigger. The smoothness of the background change is determined by the control smooth parameter. Right-clicking or long-pressing the background trigger will open up the background selection menu, which allows you to select the trigger's background from all of the previously selected background triggers or to import a new background from a file. You can also drag media files from your computer directly into the profile triggers.
Supported background formats are:
The supported video codecs may vary depending on your platform.
Clicking a set depth sample trigger will start loading the sample to an [active input trigger]. Once the sample has finished loading the active sample trigger will automatically fire and start playback of the sample.
The active input trigger where the sample is loaded is chosen to be the one that has been used the least in the past.
Right-clicking or long-pressing the sample trigger will open up the depth sample selection menu, which allows you to select the trigger's depth sample from all of the previously selected sample triggers and depth sample presets or to import a new sample from a file. You can also select a previously defined sample loop to be played when the trigger is activated.
The controls tab allows you to modify a wide variety of different parameters to the mixed 3D data ranging from raw geometry deformations to intricate glsl shaders.
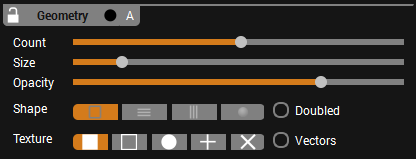
The geometry panel controls the general geometry type that's formed from the 3D pixel grid's data.

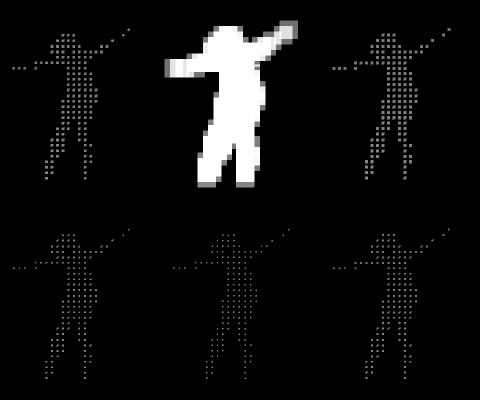
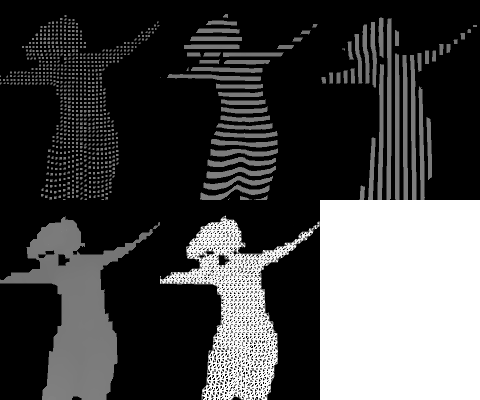
Choose from four different geometry types
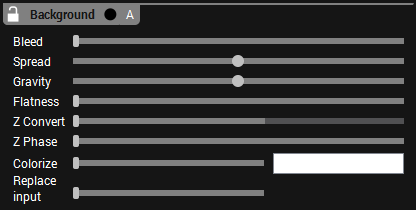
The background panel controls the deformation and coloring of the background plane. Any 3D pixel that doesn't have valid depth data from the inputs is transformed into a background pixel.
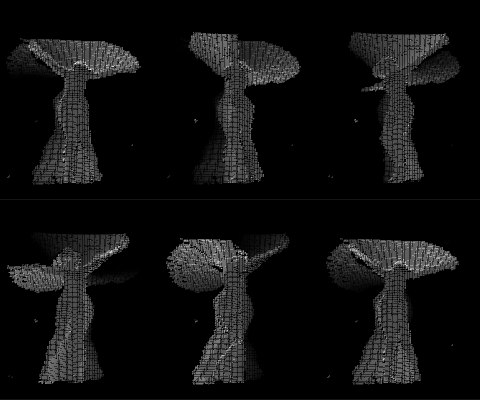 The time it takes for the background transformation to happen. When the bleed is zero the transformation happens instantly and it's not visible, but by increasing the bleed the transformation becomes more and more visible creating a trail of geometry from the input data to the background.
Normally the transformation happens to the depth of the background plane as defined by the camera -> background parameter, but if the background completely faded away (the camera -> fade parameter is smaller than camera -> background parameter) the depth of the background will be partially ignored so that the transforming pixels will be visible for a longer time. The amount to which the depth of the background is ignored increases with the difference between the background and fade parameter values.
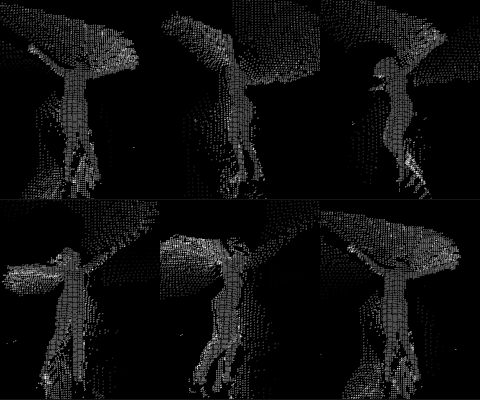 Scaling of the background. When used together with the bleed parameter this can create very interesting effects as the transforming geometry is spread across the 3D space before being completely transformed into the background.
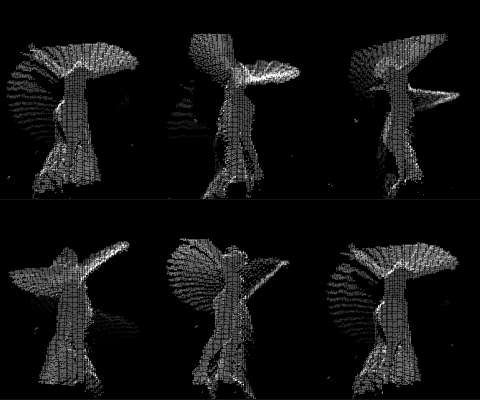 Moves the background up and down.
Every background image/movie is always scaled by keeping it's original aspect ratio and in such a way that it fills the required aspect ratio for the background grid. If the single width option is in use the aspect ratio is 4:3, otherwise it's 8:4.
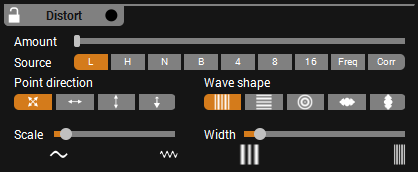
The distort panel controls the 3D deformation of the pixel grid.
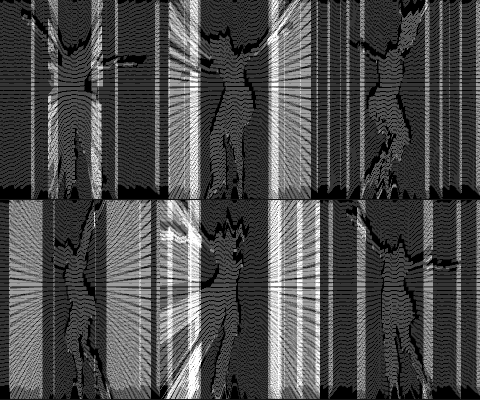
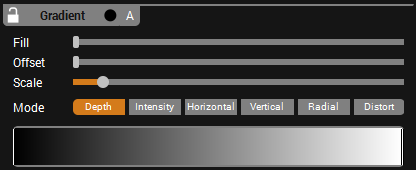
The gradient panel controls allow you to color the pixel grid with a gradient. The gradient opacity controls the amount of gradient coloring applied to the pixels.
Chooses the shape of the gradient based on multiple different values.
The actual gradient editing is performed with these mouse controls:
Double click
Drag
Right click
Alt click
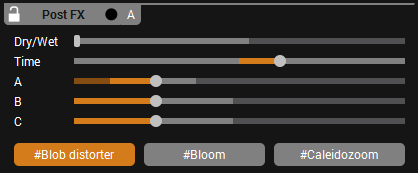
The post fx panel controls allow you to apply glsl shader effects on top of the rendered output.
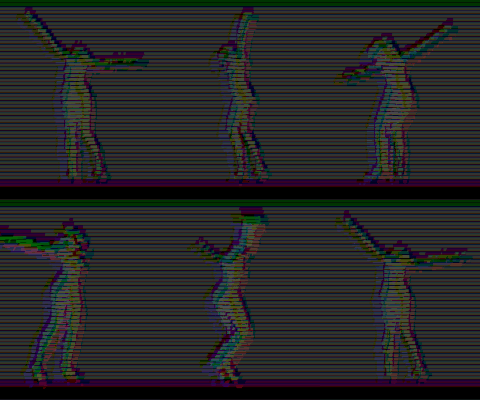
Right-clicking or long-pressing the button allows you to select the effect or to load the current effect into the fx shader editor.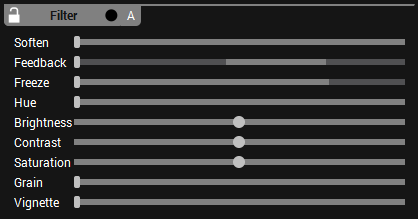
The filter panel contains different effects that are mostly applied on to of the post fx shaders to create the final output.

The meta controls allow you to change multiple parameters with a single slider control. The assigned meta controls are saved into the active scene.
You can assign the parameters that belong to each meta control by activating the meta mapping mode. Once assigned you should name the meta controls with a descriptive name to make it easier to remember what parameters each meta control effects.
The meta control assignment lists show a list of all parameters that are assigned under a meta control.